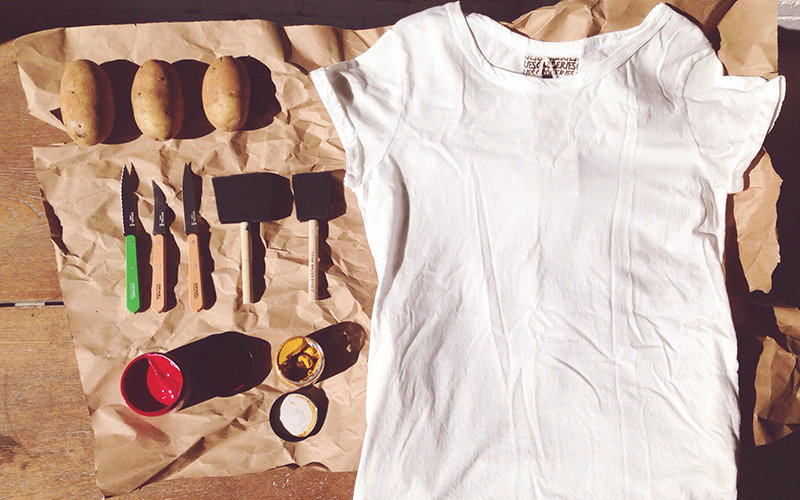
by guest blogger Julie Malone, assistant buyer at Rodale’s and garden blogger, and Brett Riggle, web merchandiser at Rodale’s
It’s coming…slowly…surely… It’s nearly here…warm weather!
Every year, as the ground thaws and we box up our winter clothes and unpack much-missed lighter layers, we inevitably crave a little newness in our lives.
While there are many wonderful easy-breezy options out there if you’re in the mood to shop, one of our favorite ways to refresh an existing wardrobe is by embellishing old favorites—a fun way to keep your closest fresh and environmentally friendly year-round.
So how do you revitalize last year’s looks? With potato block printing! It’s a quick, inexpensive, and super easy way to update a classic shirt or dress. In just about an hour, you can transform just about any plain piece (new or old) into a striking fresh look for spring.
What you need:
- Potatoes
- Knives
- Sponge brushes
- A classic dress or shirt (we chose the effortlessly cool organic-cotton Dylann dress from Rodales.com)
- Water-based fabric ink
- Cardboard/table protector
- A great buddy to craft and laugh along with (optional, yet pretty essential)
How do you it:
1. To start, lay out your article of clothing and decide how much color/pattern you want. One color? Five colors? One shape or 10? All over, or just a pop? With our Dylann dress, we loved the shape and design so much that we didn’t want to overpower it with pattern. Instead, we decided on simply adding a light personal touch across the bottom. Inspired by bright summer melons, we chose ochre and magenta inks and decided to elaborate on the shapes of the fruits when cut.
Tip: If this is your first time potato printing, keep it simple! Simple shapes are easy to carve and handle until you get the hang of things.
2. The next step is to begin cutting your potato(es) in half. You’ll use a paring knife to carefully carve a relief pattern—be sure to carve away from your body to protect your fingers!
Tip: You can also use a cookie cutter to cut a shape out of the potato.
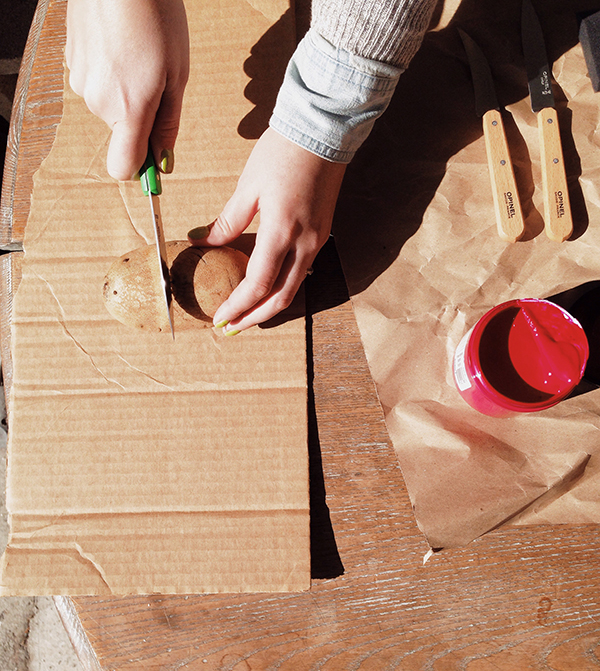
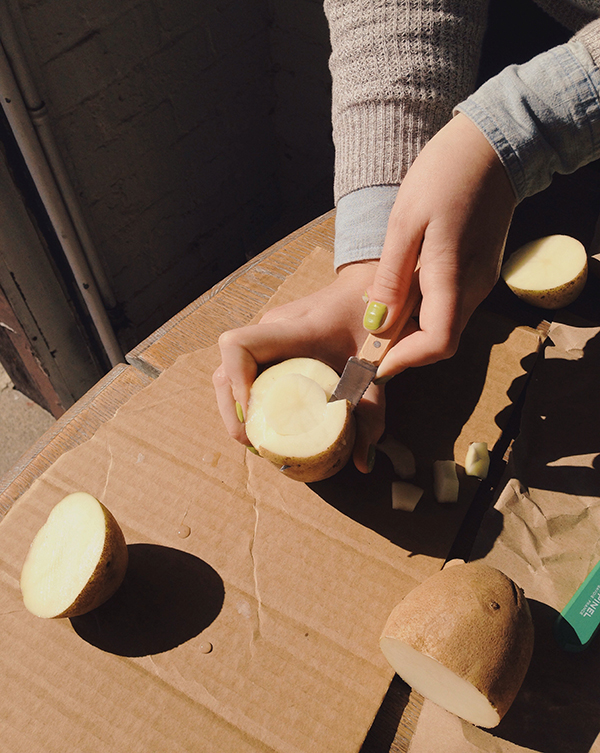
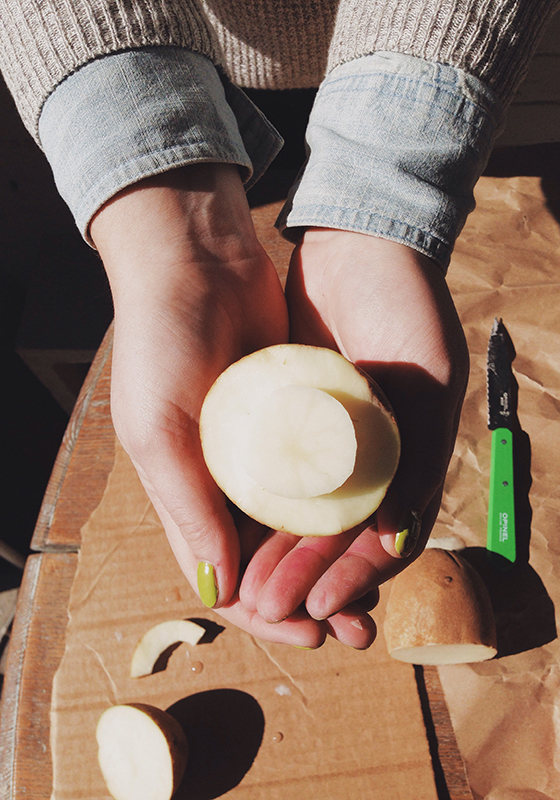
3. Once you’ve carved your stamp, it’s time to print! We recommend doing a test print on a scrap of fabric or paper to be sure it’s what you want before trying it on your final fabric. If you love it, it’s onto the final steps!
4. First, place a piece of cardboard between the fabric layers so the ink doesn’t bleed through.
Tip: It’s helpful if you have a second set of hands to help hold the fabric in place while you print.
5. Blot your potato dry and apply ink to the raised potato stamp with a sponge.
6. Gently begin stamping your pattern across the fabric until you have all the layers you want. Repeat for the second color/pattern as desired. Again, first cut your shape, then test, and then print!
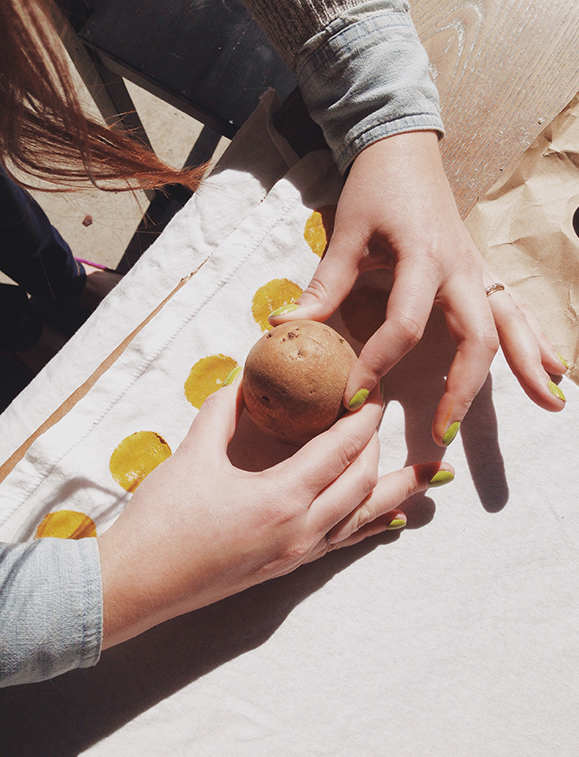
7. Carefully set aside and let the ink dry (and heat set, as per ink instructions) and voilà, you have a “new” dress!
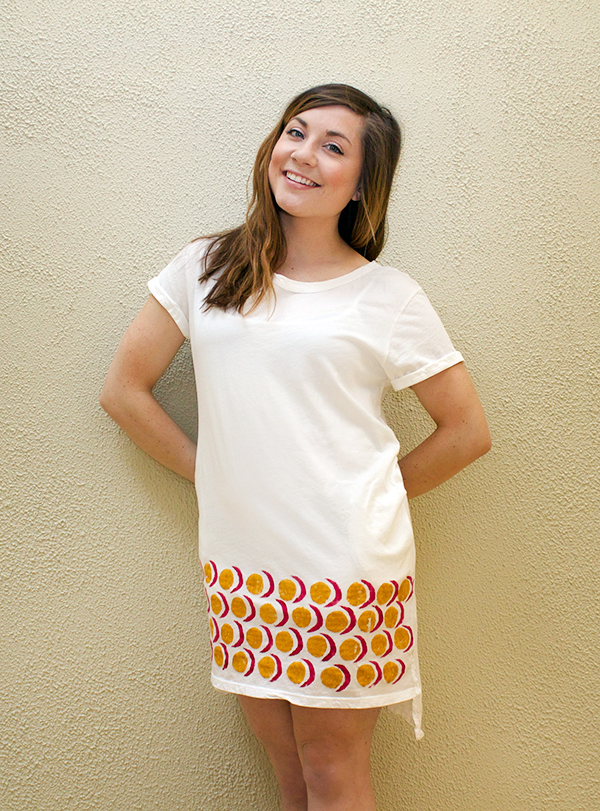
Because potato stamps are perishable, you can also feel awesome knowing you’re wearing a one-of-a-kind piece…that is, if your buddy doesn’t make one at the same time. (And what’s better than twinsie outfits?)
Hope the weather in your area calls for spring dresses sooner rather than later—we’ve earned it!
 Julie Malone buys home and garden goods for Rodale’s. She lives in South Philly with her Internet-famous cat, crooked-tailed dog, and too many plants to count. She believes in laughing hard, taking it easy, and treating the earth with a gentle hand. Her blog can be found at juliepeach.com and her Instagram, at instagram.com/julieamalone.
Brett Riggle is the web merchandiser at Rodale’s. She is a recent Brooklyn transplant who now lives in Easton, Pennsylvania, with her philosopher husband and very large cat. She spends her time cooking meals for friends, going on long runs, and rewatching TV shows from the ’90s. She also dabbles in knitting, sewing, ceramics, and making craft cocktail bitters.




No comments yet.